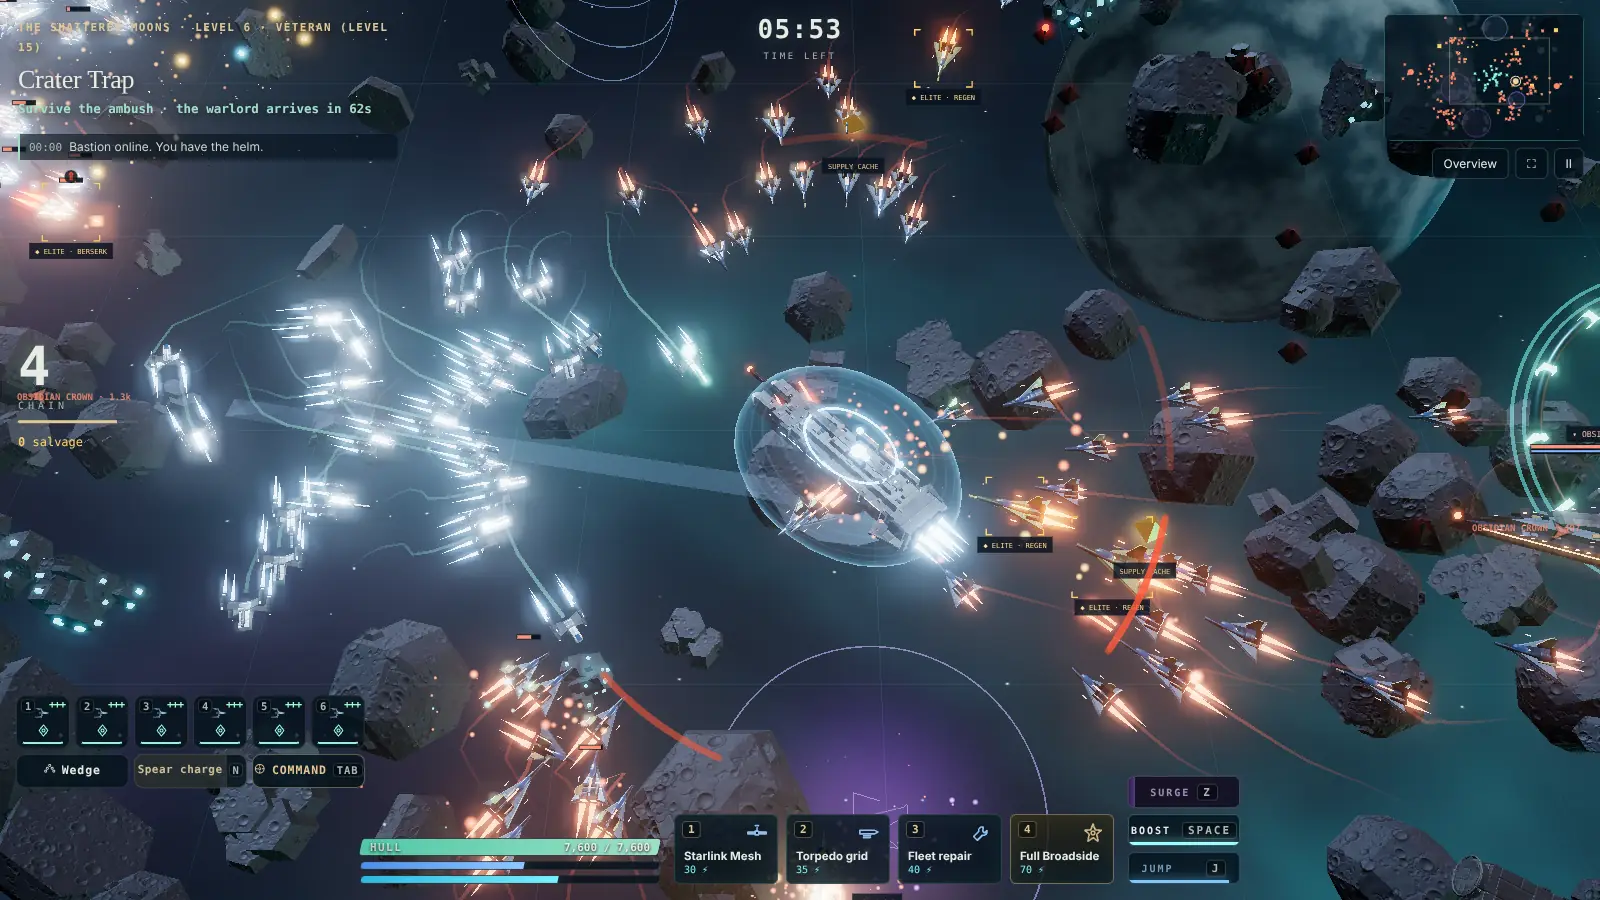
Up to six squads fly with your flagship. Used well, they double the strength of your fleet. This guide covers the squad types, their duties, the formations and their skills, ranks and crews.
Squad types
- Interceptors: fast fighters that hunt enemy small craft.
- Bulwarks: heavy gunships that soak fire and protect what they escort.
- Lancers: bombers that hit capital ships and stations hard.
Your six squads start as two of each. Each civilization flies its own designs, so the small craft change with the crews you hire.
Duties
| Escort | Fly in formation around your capital and engage whatever comes close. |
|---|---|
| Attack | Hunt the target you mark, then clear the area around it. |
| Defend | Guard an ally, station, convoy or point and intercept anything that comes near it. |
| Hold | Hold a position and fire on anything in range. They will not chase. |
| Intercept | Hunt enemy fighters that threaten your capital. |
| Objective | Fly to the active objective or side quest and fight there. |
Give orders in command mode (Tab): pick squads with 1–6, a duty key, then click. A good default: two interceptor squads on Intercept, lancers on Attack against the biggest capital, bulwarks on Escort.
Formations
The formation decides where escorts fly around you and gives the whole fleet a bonus. Each one has a skill, used with N. Press B to cycle, or turn on automatic formations in the battle’s command panel.
Wedge
An arrowhead ahead of your capital. Strikes first.
Best for: Breaking a line, hunting capitals
Skill · Spear charge (32 s): Every squad drives at the hostile nearest your aim: +35% attack, +40% speed for 6 s.
Line abreast
A wide wall either side of you. Maximum firepower forward.
Best for: Open fields and big wings ahead
Skill · Broadside (30 s): Every escort fires a heavy volley at the nearest hostile at once, then fights at +20% attack for 5 s.
Shield ring
A tight circle around your capital. Best when you are swarmed.
Best for: Swarms, ambushes, survival
Skill · Aegis (40 s): Restores a third of your shields, patches every escort for a quarter of its hull, and the ring takes 30% more of your fire for 6 s.
Screen
A wall between you and the nearest threat.
Best for: Escorts and heavy incoming fire
Skill · Deflector wall (34 s): Nearby enemy fighters turn on your escorts instead of you; escorts take 35% less damage for 6 s.
Pincer
Two wings far out on your flanks that fold onto the enemy.
Best for: Flanking slow capitals and stations
Skill · Crossfire (32 s): Marks every hostile within reach: they take 30% more damage from everyone for 6 s.
Phalanx
A locked shield wall just off your bow. Slow, and very hard to break.
Best for: Pushing into heavy fire
Skill · Shield lock (38 s): Escort shields refill at once and the wall shrugs off most damage for 4 s.
Hornet swarm
A loose cloud far ahead that hunts down fighters.
Best for: Fighter swarms and interceptors
Skill · Sting (26 s): Every escort strikes the nearest enemy fighter for heavy damage, then hunts faster for 5 s.
Battering ram
A dense column driven straight ahead of you.
Best for: Capitals and stations
Skill · Ram (36 s): The column slams the hostile capital nearest your aim: it is stunned and shaken, and every squad piles in.
Mirage
Staggered, shifting lanes that confuse enemy gunners.
Best for: Bosses, snipers and heavy guns
Skill · Phantom wing (34 s): Phantom echoes surround your capital: 40% of enemy fire aimed at you misses for 6 s.
Ranks
Squads rank up with kills, and each rank adds attack and hull: Recruit (0 kills), Regular (30 kills), Veteran (90 kills), Elite (200 kills), Ace (400 kills). A squad that dies loses nothing, so do not be afraid to throw them at a target.
Crews
At Meridian Station’s crew hall you can hire 14 crews from different civilizations. A crew changes a squad’s stats and gives it a skill that fires on its own (or all together with K). Some examples:
- Earthforce Starfury wing (Earthforce). Your own pilots in X-frame fighters. Steady, reliable, and already on the payroll. Skill: Strafing run, every craft in the squad makes a heavy gun pass on the nearest hostile.
- Blood Riders (Korrath Dominion). Korrath duellists. They close fast and hit hard, and they do not dodge. Skill: Bloodrush, the squad frenzies for 5 s: faster and harder hitting.
- Brood flyers (Verdant Choir). Living fighters that swerve like birds. Skill: Spore trail, a corrosive burst around the squad that keeps eating hulls.
- Veil Corsairs (Veil Nomads). Salvage-clan raiders: the fastest wing for hire. Skill: Ambush, the squad swoops on the nearest hostile with everything it has.
- Covenant Moonblades (Selene Covenant). Pearl darts that are half hidden from enemy sensors. Skill: Moonflash, a blinding flash disables the craft around the squad’s target.
- Throne Sun-gliders (Gilded Throne). Arched gliders flown by freed Throne pilots with a grudge. Skill: Staff run, four staff-cannon shells land around the squad’s target.
- Mandate Bastion Guard (Iron Mandate). Deserters from the Mandate: slow, armoured, unbreakable. Skill: Shield wall, the squad locks shields; your capital gets a share if it is close.
- Tidekin Skimmers (Myrr Tidekin). Tide-ships that ride incoming fire like a wave. Skill: Riptide, a cold surge around the squad slows every hostile in it.
Fleet synergies
Your flagship, the crews flying your squads, your hired warships and your relic wing each belong to a civilization. Some civilizations work together: when your fleet holds both halves of a pair, the ships of one half radiate an aura, and the ships it is for get a bonus while they are within its reach. That makes positioning matter. Keep the squads that need an aura close to the ship that radiates it, and use the formation and squad positions to do it. In battle a faint dashed ring shows each aura’s reach, and the Crew hall and the Warship dock list the synergies you have and the ones you are one pick away from.
| Synergy | Needs | Radiates from | Bonus |
|---|---|---|---|
| Drone Lattice | an Earthforce carrier flagship or hired warship + any Tessellate ship or crew | The first, 420 m, to drones | +25% damage, +20% fire rate, +2% hull per second; prints 2 drones every 20 s (up to 6) |
| Shieldwall Compact | any Iron Mandate ship or crew + any Elder Conclave ship or crew | The second, 380 m, to your squads | +12% less damage taken |
| Tidesong | any Myrr Tidekin ship or crew + any Verdant Choir ship or crew | The first, 480 m, to every ship | +0.8% hull per second |
| Raiders’ Pact | any Korrath Dominion ship or crew + any Veil Nomads ship or crew | The first, 400 m, to Wisp squads | +15% damage, +10% fire rate |
| Focused Light | any Aurelian Concord ship or crew + any The Lumina ship or crew | The first, 420 m, to Needle squads | +20% damage |
| Requiem Watch | any Selene Covenant ship or crew + any The Hollow ship or crew | The first, 400 m, to every ship | +8% damage, +6% less damage taken |
| Gilded Accord | any Gilded Throne ship or crew + any Varenn Regency ship or crew | The second, 480 m, to capitals | +15% fire rate |
| First Friends | an Earthforce flagship or hired warship + any Myrr Tidekin ship or crew | The second, 400 m, to your squads | +6% less damage taken, +0.6% hull per second |
Different synergies add up, but the same one never stacks with itself, and no ship can get more than +40% damage, +30% less damage taken, +40% fire rate, +3% hull per second from all its auras together. The battle simulator has no synergies, so its fights stay even.